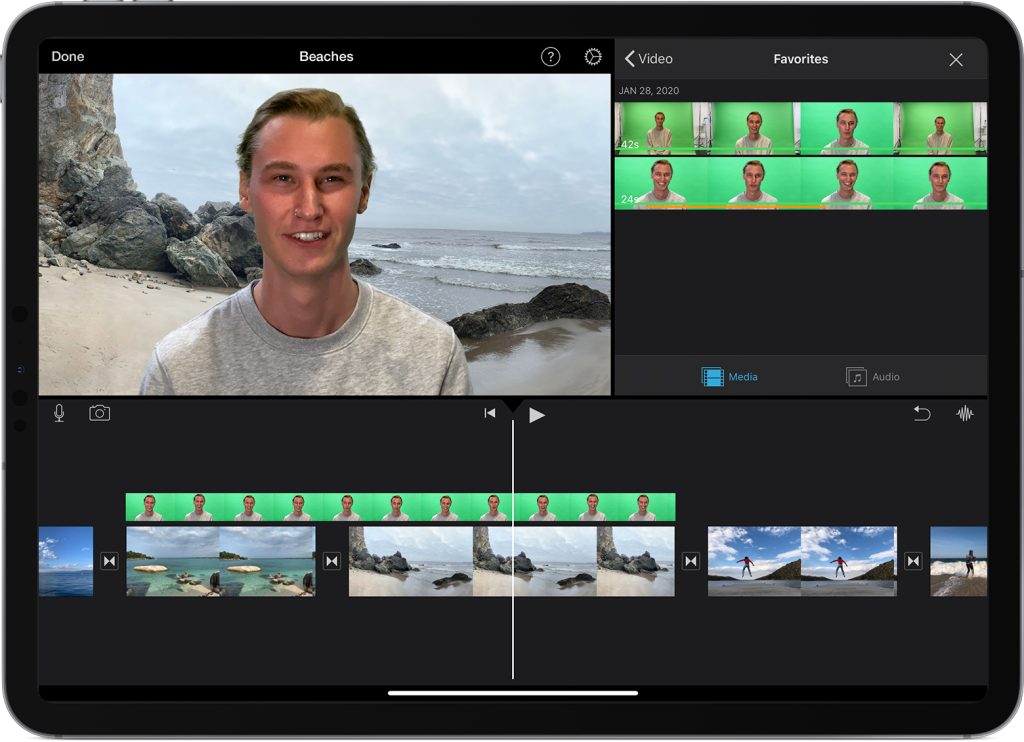
- With your project open, add the background video clip or still image to the timeline.
- Scroll the timeline so the playhead (the white vertical line) appears over the background clip.
- Tap the Add Media button
 , tap a category from the list, then tap the green-screen clip to select it.
 - Tap the More button
 , then tap Green/Blue Screen. The green-screen clip is added to the timeline above the background clip.
 - In the viewer, tap Auto to automatically remove the green or blue from the clip. Or tap the colour in the clip in the viewer to remove that colour.
- Trim and move the background video clip to match the length of your green-screen clip. As the clips are connected, the two clips move together when you rearrange clips in the timeline.
After you’ve added the green-screen effect, you can make adjustments.
* Tap the green-screen clip you want to adjust in the timeline, then use any of the green-screen controls to make adjustments:
- To change the amount of green or blue removed from a green-screen clip, tap the Adjust button, then drag the Strength slider left or right.
- To crop parts of a green-screen clip, tap the Mask button, then drag the corners.